A Spoke in the Spanners
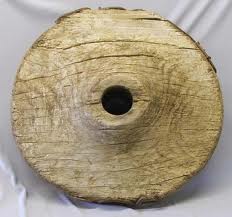
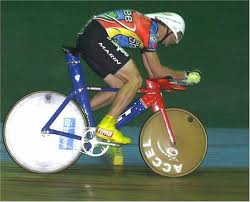
Let's get this straight - a disc wheel is NOT the latest technology. It is the first - a slice off the end of a log started it all, and lives on in the indoor velodrome. Indoor, because riding one those in the great outdoors is asking for trouble. Anything other than a direct head or tailwind, and you feel it in the wheel.
But, solid wheels are heavy, so the obvious thing to do is to remove mass from the disc. Lots of holes, and you have the development of spokes. Of course, a spoke is a separate piece of the wheel, and with spokes you get a wheel that is made of many pieces - the hub, a rim, and a whole pile of spokes. Chariot wheels, cartwheels, car wheels, bike wheels. yet, there are some differences, and it comes down to radial or cross.
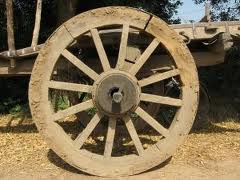 The earliest spoke layout is radial. Simply, a spoke lies along the line from hub centre to rim. Cartwheels are radial, as are aero spokes. As the wheel turns the spoke beneath the hub experiences a compressive force, bending slightly. This flattens the section of the wheel around the contact point, while the rest of the wheel remains circular. A radial spoke experiences the entire compressive force unassisted, so the greater the weight of the rider and bike is, the greater the degree of compression and flexion. This can be reduced by increasing the spoke tension, as it effectively reduces the tension when under load, but the repeated flexion back and forth works to progressively fatigue the metal, with ultimate failure. So, metal fatigue being what it is, if you can minimise the compressive flexion you can reduce fatigue and extend the life of the spoke. To minimise flexion, you can either reduce spoke tension, combined downward force, shorten the spoke, or use a cross-over pattern.
Tension, Wheel Design and Truing
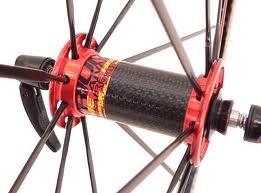 Cartwheels had all of the spokes lying along the same plane, that is, the hub ends were mounted around the centre of the hub. Modern wheels, including some laced car wheels, have the hubs laced from two anchor circles, one at each end of the hub. Looking at the wheel edge-on, the spokes, hub and rim form an isosceles triangle, utilising the inherent structural strength of a triangle. This design helps maintain the circular shape of the rim, which typically does not have the strength to keep itself circular (or true). The tension of the spokes, evenly spaced around the rim and alternating in hub-end anchor points, gives the rim its strength. We can true a buckled wheel by systematically easing and increasing the tension in spokes to either release or pull the rim towards the relevant side of the hub centre line. Similarly, a rim may be true centrally, but oval. Again, we adjust spoke tension to reduce the ovality of the rim.
Easing spoke tension is not, then, a good strategy for reducing flexion. But you cannot over-tension spokes, either. Wind up anything beyond snapping point, and it will snap. Or other damage. And this brings us to spoke number.
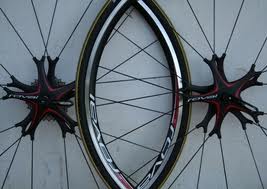
Spoke Number
Front wheels are typically under less stress than the rear wheels, which are pretty much directly under your butt. My favourite front wheel has sixteen blade spokes laced radially. The matched rear wheel popped a spoke once a month. I tried an eighteen-spoke build on the rear, but for my weight it was inadequate. The spokes did not break, but the tension that I had to run them at led to the spoke nipples being pulled through the rim eyelets. Fail. The next build was a 24 spoke Gipiemme, with the customary triplet-spoke lacing. Almost there, but hairline cracks appeared around the eyelets, so it is now an emergency spare wheel.My current build is a 28-spoke with 2-cross lacing, and after the first 4000 km does not need any truing adjustments, so I am sticking with this pattern.
Lacing: Radial or Cross
 |
| Lacing guide from Sheldon Brown |
Simply, the more cross-overs the stronger the wheel. part of this comes from the tangential positioning of the spokes. Rather than aligned along the radius of the wheel, the spoke is anchored further around the hub, almost at a tangent to the hub edge. As a result, the spoke that is under direct compressive tension is transmitting the compressive force outwards to the hub edge, triangulating the force away from the hub. Rather than a linear compression, the downwards force is shifted sideways, with the spokes held against excessive flexion by the crossing spokes, thereby minimising flexing and fatigue.
For detailed discussion on wheelbuilding and spoke cross patterns, two good sites include the famed, late Sheldon Brown, and the Spoke and Wheel site.
Many wheels are built with three-cross, but I find a two-cross pattern fine for my build and weight. So, how long?
Spoke Length
The easy way is to use an online spoke-length calculator. Two that I use are Edd.com, and the DT-Swiss calculator. If your hub and rims are already in the calculator databases, you merely enter the specific details - number of spokes and how many cross-overs. If your hub or rim is not in the database, you can manually enter the hub dimensions. I used both, and compared for consistency before ordering (they matched). If you do not want to use the calculator, you could do it yourself, but you must first measure the hub carefully - hole spacings, radial distance of the holes, flange separation and hub length (remember flanges on the rear hub are different distances from the centre), and rim internal diameter and hole spacing. You then should sketch carefully your cross-lacing pattern, and then you use the Cosine Rule to calculate spoke-radius angles, which you then use with the Sine Rule to calculate the central distance of spoke hole to rim hole. This is then used with the Pythagorean Theorem and the hub-flange distance to calculate the hypotenuse, also known as the spoke length.
Yeah, you say, easy for me to say. I teach high-school math for a living. I'm a trained professional (trust me, I know what I'm doing...). So, use the calculator. Unless you have an unusual lacing pattern, such as the Gipiemme triple on the Campagnolo wheel. Then you have to do it the long way, as I did.
Purchase


 Surprisingly, not many of the online traders deal in build-quantity spokes. Some offer rebuild kits, others will do you a box of a hundred spokes all of the same length, but few will let you nominate lengths and quantities. One that does is Bob Dopolina, a Canadian rider now trading through bdopcycling in Taiwan, where he now lives with his family. I had earlier bought a hub from him, and would have again had the Miche boxed pair not become available. But his spoke deals are customer-focussed, and a bit of email-trading established the three spoke lengths, and quantities needed, for the paired wheel build. For the grand total of NZ$85.72, 64 spokes were delivered to New Zealand from Taiwan inside a week.
 Spokes do not come with nipples, the threaded nuts that anchor the spokes to the rims. Thankfully, these are widely available through eBay traders in varying quantities, materials and colours. NZ$11.62 bought me a packet of 75 blue spoke nipples, delivered by registered mail (why?) inside ten days.
I now have the hubs, rims, spokes and nipples needed to build a matched pair of wheels, and the wheel stand to do it with. All is good.
Next mission is to get back to the drive train, and find a pair of shifters.


